Thursday, November 19, 2020

Crochet Hand Bag/Stuff Sack

CROCHET HAND PURSE/STUFF SACK PATTERN
Supplies:
Heavy cotton yarn, worsted weight
Crochet hook, size I - or whichever is appropriate for the yarn
Yarn needle
Optional decorative yarns, buttons, etc.
(The small bag I made used #36 nylon cord and a 00/2.5mm crochet hook)
Instructions:

This project is crocheted in a spiral formation. It is helpful to mark the first stitch on each row, in order to keep track of rows and stitches.

Round 1: make an adjustable ring with 6 sc. (or: ch2, 6 sc in 2nd chain from hook)
Round 2: make 2 sc in each sc = 12 sc
Round 3: sc in next sc, increase in next sc, repeat around = 18 sc
Round 4: *sc in next 2 sc, increase 1 in next sc, repeat from * = 24 sc
Round 5: *sc in next 3 sc, increase 1 in next sc, repeat from * = 30 sc
Round 6: *sc in next 4 sc, increase 1 in next sc, repeat from * = 36 sc
Round 7: *sc in next 5 sc, increase 1 in next sc, repeat from * = 42 sc
Round 8: *sc in next 6 sc, increase 1 in next sc, repeat from * = 48 sc
Round 9: *sc in next 7 sc, increase 1 in next sc, repeat from * = 54 sc
Round 10: *sc in next 8 sc, increase 1 in next sc, repeat from * = 60 sc
Round 11: *sc in next 9 sc, increase 1 in next sc, repeat from * = 66 sc
Round 12: *sc in next 10 sc, increase 1 in next sc, repeat from * = 72 sc
Round 13: *sc in next 11 sc, increase 1 in next sc, repeat from * = 78 sc
Round 14: sc in each sc around = 78 sc and next 3 rows. (4 rows sc total)
Round 18: slip st first st, chain 3 skip next st, dc next st, chain 1, skip next st around. Join to 2nd chain w/slip st.
Round 19: sc in each sc around = 78 sc and next 3 rows. (4 rows sc total)
Round 23: slip st first st, chain 3 skip next st, dc next st, chain 1, skip next st around. Join to 2nd chain w/slip st.
Round 24: sc in each sc around = 78 sc and next 7 rows. (8 rows sc total)
Round 32: slip st first st, chain 3 skip next st, dc next st, chain 1, skip next st around. Join to 2nd chain w/slip st.
Round 33: sc in each sc around = 78 sc and next 3 rows. (4 rows sc total)
Round 36: slip st first st, chain 3 skip next st, dc next st, chain 1, skip next st around. Join to 2nd chain w/slip st.
Round 37: sc in each sc around = 78 sc and next 3 rows. (4 rows sc total)
Round 40: *sc in next 11 sc, decrease 1 in next sc, repeat from * = 72 sc
Round 41: *sc in next 9 sc, decrease 1 in next sc, repeat from * = 66 sc
Round 42: sc in each sc around = 78 sc and next 3 rows. (4 rows sc total)
Round 45: slip st first st, chain 3 skip next st, dc next st, chain 1, skip next st around. Join to 2nd chain w/slip st.
Round 46: sc in each sc around = 78 sc

Hide yarn ends by weaving into fabric w/yarn needle.

Use two braided strands as handles, weave through top dc in opposite directions.
(I used a 4-strand round plait braid)

OPTIONAL DETAILS:

*Create a decorative edge by crocheting w/ a contrasting yarn on the last row.
*Little handles are easy to make by creating strips of single crochet.
You may need to adjust the number of stitches and rows based upon your gauge
and finished size of basket. This is how the green accent handles were made:
Chain 13
sc in second chain from hook, and each chain across = 12 sc
sc in each chain = 12 sc
end.
Add decorative hand embroidery to the strips, if desired.
Fold strip in half, overlapping ends. Tack securely onto opposite sides of basket.
Weave ribbon through dc rows and tie with a bow on the front of the bag.

Wednesday, June 26, 2013

Hot Process Soap!

 Well, my artistic focus has once again changed. I'm over my knitting obsession. So much so that I have unfinished projects sitting in the bag in the corner of the room. Maybe I'll go back to them someday. On to my newest obsession: Hot Process Soap Making! I have always loved J.R.LIGGETT'S Natural Bar Shampoo and I've been wanting to make my own for quite a while now.  After studying videos on You Tube and reading forums and groups I finally took the plunge.It took me a while of saving up and purchasing supplies little by little in order to make my first batch.
Days before I was ready to work, I boiled some distilled water and added several green tea with jasmine tea bags and let it steep for about 10 minutes.  Then, after removing the bags, I boiled it down a little to concentrate the tea. (to about three-quarters of what it was) Then I stored it in the refrigerator until I was ready to use it.

I was a little nervous working with the sodium hydroxide with the tea at first.  When I went to mix it, wouldn't you know I chose a container with a crack in the bottom! Luckily, I had another close at hand and I only had a small puddle to clean up. Phew! First hurdle overcome!

After weighing out my oils and setting the crock-pot to high to melt the solids, my next harrowing moment was adding the lye to the oils.  Piece of cake! I'm very proud of myself for not splashing and making more of a mess.  I stirred and blended with a stick blender.  The soap came to a trace really fast within two or three minutes.  I was surprised at that since most sites I've read say that trace can take 15 minutes to reach.

Now, I turned the crock-pot onto low and set the timer for 30 minutes. I stirred the mix every 30 minutes for 2 hours and it did it's thing perfectly and turned to a vaseline consistency. Next, I weighed out and added my Moroccan Argan Oil and Tea Tree Oil, stirred well and molded. The smell was overpowering! I do believe I used way too much tea tree oil.  When doing hot process, I read that you use a lot less essential oils than in cold process.  Next time, I'm going to cut the scent down to about a quarter of what I put in this batch.  Our room was permeated with the scent for days!

The mold I used was a drawer organizer I found at Dollar Tree for 2 for $1.  It's the perfect size for guest soaps. After waiting 24 hours, I unmolded and cut the bars into 1 1/4 inch thickness.  Beautiful. I set them up on the shelf to cure for 2 weeks before I start gifting this batch.  The next soap I make, I'll consider putting up on Etsy.

Here's my recipe adapted from The Soap Queen's recipe:

TEA TREE AND ARGAN OIL SHAMPOO BARS
  • 10 oz. Coconut Oil
  • 10 oz. Palm Oil
  • 8 oz. Caster Oil
  • 8 oz. Olive Oil
  • 13.68 oz. Distilled Water infused with Green Tea and Jasmine
  • 5.36 oz. Sodium Hydroxide
  • .5 oz. Tea Tree Oil
  • 1 oz. Moroccan Argan Oil
  • 15 drops of Euphoria essential oil.

Monday, November 19, 2012

Love This Yarn!

This is Sensations - It's A Wrap yarn.  I am loving this stuff.  It's color-wrapped plies with a touch of wool.  It's a #5 bulky yarn that is so very soft and luxurious.  I am making a Christmas gift with it right now and I'm totally addicted to the way this yarn is just so cuddly in my hands!

Tuesday, August 28, 2012

FREE PATTERN! Basketweave Baby Blanket

_BASKET WEAVE BABY BLANKET_

Finished size -
8 Skeins of Caron Simply Soft WW yarn (I'm half-way done and I've used 4 skeins so I'm estimating a total of 8)
Size 6 knitting needles 30" if using circular
Gauge - 32 rows/32 sts = 4" in garter stitch.
Yarn needle

Cast on 144 stitches using cable cast on.
IMPORTANT! Slip all first stitches as if to knit on every row.
Rows 1-16 K.  You should have 8 ridges of garter stitch.
Begin pattern as follows:
Row 17 - K across.
Row 18 - K7 (*K6, P4 ) repeat from * across to last 7 stitches. K7.
Row 19 - K7 (*K4, P6) repeat from * across to last 7 stitches. K7.
Row 20 - K7 (*K6, P4) repeat from * across to last 7 stitches. K7.
Row 21 - K7 (*K4, P6) repeat from * across to last 7 stitches. K7.
Row 22 - K7 (*K6, P4) repeat from * across to last 7 stitches. K7.
Row 23 - K across.
Row 24 - K7 (*P4, K6) repeat from * across to last 7 stitches. K7.
Row 25 - K7 (*P6, K4) repeat from * across to last 7 stitches. K7.
Row 26 - K7 (*P4, K6) repeat from * across to last 7 stitches. K7.
Row 27 - K7 (*P6, K4) repeat from * across to last 7 stitches. K7.
Row 28 - K7 (*P4, K6) repeat from * across to last 7 stitches. K7.
Repeat pattern rows for a total of 18 repeats. (216 rows total)
K last 16 rows in garter stitch to create 8 ridges.
Bind off. Weave in ends.

Wednesday, March 28, 2012

FREE PATTERN: Mickey's Market Bag!

ERRATA: Rnd 1: pm, k1, m2, k to last 2 sts of 1st side, m2, k1, pm. Repeat on second half. Rnd 2: k around Rnd 3: k2, m2, k to last 3 sts of 1st side, m2, k2. Repeat on second half. Rnd 4: k around Rnd 5: k3, m2, k to last 4 sts of 1st side, m2, k2. Repeat on second half. Rnd 6: k around Rnd 7: k4, m2, k to last 5 sts of 1st side, m2, k4. Repeat on second half. Rnd 8: k around Continue stepping over 1 st on all odd numbered rounds so that you are doing the m2 on the middle stitch of the last group of m2 in the previous increase round until you have 128 sts. (Should be a total of 10 increase rows)
Measure 12.5 inches from start of mesh (not from cast-on)

Saturday, February 11, 2012

Free Pattern - Knitting an Oval Shape


KNITTING AN OVAL SHAPE

Using a 32" - 40" (preferred) circular needle, using a figure-8 cast-on half the number of desired stitches.  For example, if your pattern calls for 40 stitches, cast-on 20. Knit through back loops to establish the base.
If you leave 3x as much yarn as cast on stitches. Then you can use that long tail (after knitting a few rows) to weave through the center stitches for extra support.

pm = place marker
m2 = k front, back, front in same stitch

Rnd 1: pm, k1, m2, k to last 2 sts, m2, k1
Rnd 2: k around
Rnd 3: k2, m2, k to last 3 sts, m2, k2
Rnd 4: k around
Rnd 5: k3, m2, k to last 4 sts, m2, k2
Rnd 6: k around
Rnd 7: k4, m2, k to last 5 sts, m2, k4
Rnd 8: k around

Continue stepping over 1 st on all odd numbered rounds so that you are doing the m2 on the middle stitch of the last group of m2 in the previous increase round until you have the desired length for your oval.

Friday, January 27, 2012

Free Pattern - Sleep Sox!

I adapted this pattern from a WW1 pattern from the Red Cross.  I added a cuff section and a toe section to the original tube sock pattern.

Caron worsted
Gauge 8sts = 1in in 1x1 rib
2-24" size 6 circular needles

For women's socks:
Cast on 48 sts using long tail method.
For men's socks cast on 56 for each sock. 
Children's socks, cast on 40 for each sock.
(To adjust size, cast on any number of stitches in multiples of 4)

Begin by casting on ALL the stitches for BOTH socks.
Divide onto 2 circular needles as per [http://www.youtube.com/watch?v=i4iD77aJCAw&feature=related]

Knit 2" k1, p1 ribbing
(children's size 1" k1, p1 ribbing)
(men's size 3" k1, p1 ribbing)
1 row k across
10" k2, p2 ribbing
(children's size 8" k1, p1 ribbing)
(men's size 12" k2, p2 ribbing)
Dec. for toe as follows: (same method for all size socks)
Toe will be knit in stockinette stitch.
Knit one row across to begin.
Row 1: k1, ssk, knit to the last three stitches on first half, k2tog, kl. Repeat on second half
Row 2: k across
Continue until you have 8 sts remaining on each half, finishing on row 2. (16 total)
You should have eight stitches remaining on each section of both socks. Work 2 more decrease rounds, with no even rows between. You should now have 4 stitches remaining in each section of both socks, a total of 8 stitches on each sock.
(For Men's - Continue until you have 16 sts remaining on each half - 32 total. After working last 4 decrease rounds you should have 8 sts left on each half. Cut yarn, close toe with kitchener's stitch)
Work Kitchener Stitch on each toe separately. To begin, cut the yarn, leaving a tail 10" (25.5 cm) long, and thread this tail onto a darning needle to begin the graft.
Weave in all ends

Thursday, December 15, 2011

Sock Loom

Yesterday, I got my Christmas present early.  Dwain bought me a sock loom. (from www.knittinglooms.com) So far I'm having a lot of fun with it. 

I have carpel tunnel pretty bad in both hands and it's very hard to knit even with regular needles.  I even have to use circulars just so I don't drop them when my fingers go numb.  But, I'll never give up knitting because I love it so much!  I knew without a doubt that working with teeny-tiny double-pointed needles to make socks would practically be impossible for me. Hence, the sock loom!

Many of you know that I knit for charity and that most if not all of my yarn has been donated.  Well, I ended up with enough sock yarn to make at least a dozen pairs of socks.  I really, really wanted to make socks, too.  The CT problems were really getting in the way though.

I'm really glad I got the sock loom.  I've only been working with it for a couple hours so far and I've all ready found a rhythm.  There is a small learning curve if you want to learn how to really knit and purl on the device and keeping track of where you are is also a small annoyance.  But, both of those are easily remedied.  Doing a couple rows of each stitch on some scrap yarn helps you to learn the stitches lickety-split and a piece of first-aid tape marked with some pen lines really helps you remember which stitches are knit or purled.

My only gripe about this wonderful device is trying to knit or purl on these inside pegs.  They are extremely difficult to get to, in my opinion.  Just as I'm really getting into working around the loom, I end up on those inside pegs and come to a screeching halt!  They take me twice as long to get the pick between them and not drop the loops.  I really don't know of any kind of solution to this other than actually having a different loom for each different size of sock as opposed to the adjustable one.  I guess for economy's sake and storage, this is the only real option for sock looming at this time.  I'll just have to deal with it. :-)

Friday, November 18, 2011

Hand Made Gifts!

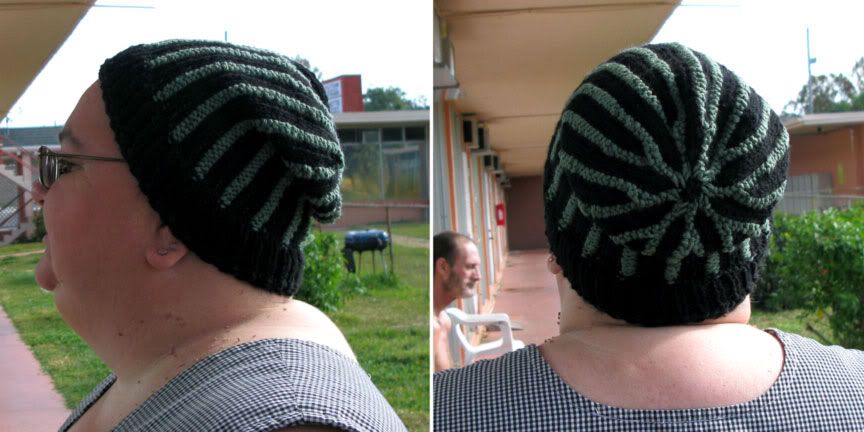
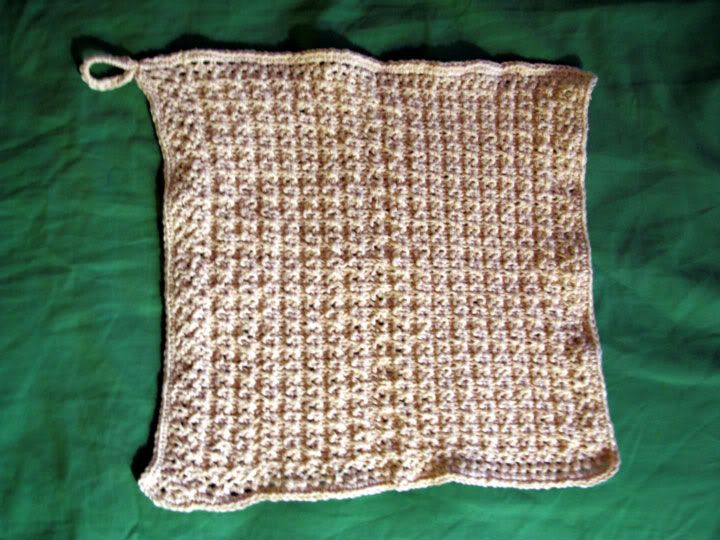
This time last year, I was intensely working on an original Christmas card design.  This year, it's all about individuality.  Everyone is getting a hand-knitted gift from me.  Knitting has become a real obsession this year.  I'm making towels, washcloths and hats for my family.  I've also made a couple hats for friends.  I also teach knitting and crochet at Project W.A.R.M. here in Daytona Beach, and I've made a couple contributions to Meals-On-Wheels through our Prayer Stitch group. Busy! Busy! Busy!  I'm thinking of setting up this page so I can take custom orders.  I can make a kitchen or bath set in about a week.  I can whip out a hat in 2 days.  I'd love to hear your thoughts about that.

Friday, August 26, 2011

How to Stitch a Prayer


How to Make Blanket of Prayers
So many people today need your thoughts and prayers. Someone you know? Your friend? A family member?  How do you find the time?  I find my favorite time to send loving thoughts of healing and peace are when I knit.  To me, knitting is such a peaceful, meditative process.  I know many people who pursue this process with crochet, also.

Funny thing though... it's just so simple to do.  Find a pattern you like, or don't.  It doesn't really matter.  You can do this with scrap yarn and any old pair of needles (or crochet hook) and start praying!  Start with something small and watch it grow.  Each stitch you make, think of the person who needs your prayers.  Each thought can be a prayer.  Just saying their name in your head, bringing their needs into the forefront of your mind is a prayer.  Repeat with each stitch as you go along, thinking of your loved one. Before you know it, you've sent that person a hundred, a thousand, ten-thousand prayers! 

When I think my blanket of prayers is big enough, I give it to that person.  (usually, I make a lap blanket size, 48"x52", or sometimes a shrug to fit over the shoulders) When I do, I tell them, "This is a blanket of prayers that I made for you.  Each stitch contains a thought of you, each row a continuous prayer and a meditation to help you through your troubles.  May it keep you warm and wrap you in peaceful thoughts."

Can you imagine if everyone who knit or crochet would focus on peace and harmony for a day?  How many prayers and thoughts of kindness could be sent out into the world?  How much healing could we do?

Pick up your needles today and stitch a prayer! 

Tuesday, April 26, 2011

My Stuff Bag

I just completed this project using #36 nylon cord.  The bag is approximately the size of a small coffee can and conveniently holds my keys, wallet, a couple packs of gum and cell phone.  I'm going to make a few more of these since I have several colors.  The next one is going to be purple for my sister in Illinois.  I also plan on making one to be a "stuff sack" for camping or trip supplies.

Friday, February 25, 2011

George Harrison Album Cover Repaint

In honor of George Harrison's birthday today... A repaint of the "Let It Roll" album cover.  Done in Corel Painter 11.  Took me about 5 minutes to complete. To clarify: This was done just for fun and is not an original artwork and it is not for sale.

Sunday, February 13, 2011

First Corel Painter Portrait


Just took my mom's picture and painted it in Corel Painter 11.  Still a work in progress.  I attended a webinar given by Helen Yancy of www.helenyancystudio.com which inspired me to try my hand at her style of restoration.

Sunday, February 6, 2011

Raw Vegan T-Shirt Design

I was inspired after my raw-lishious weekend and created this new Raw Vegan t-shirt design!

Monday, December 20, 2010

My Beloved. Completed.

This is my beloved dog, Dixie.  This took about 2 months to complete working intermittently.  It's painted completely in Adobe Photoshop.  You can see where I started at the bottom drawing with my mouse and then I got a graphics tablet for a Christmas present and you can see the difference in the rest of the painting. At the end, I also added a warming filter since I thought her coloring was just too bright.

I plan on getting this printed poster size and having it framed for my home.  She was such a beautiful and loving dog.  She was my companion for 12 wonderful years.

Friday, December 17, 2010

Golden Earrings Version 3

Newest version of Golden Earrings! CLICK on image to enlarge.

Hi Dad,
Did more work on mom today.  Fixed her lips, got rid of some more noise and scratches and tried to soften the shadows on her neck and face so she didn't look like she was smeared in mud. (grin) I hope I understood you right yesterday when you told me that the right side of the background was orange-ish.   I tried to mail it to you, but it bounced back.  I guess the file was too big.  So, I uploaded it to my art blog for you to look at.
Love you so very much!

Thursday, December 16, 2010

Photo Restoration Project - Golden Earrings

CLICK on photo to enlarge. Working on a photo restoration for my dad. This is a picture of my mom taken in 1948 entitled "Golden Earrings." Any comments, critiques, suggestions welcome. I'm just trying to restore it, I don't want to repaint it if possible. Mostly using layer masks and when I first started, I used the color balance tool to take out all the sepia and get down to the remaining color that was left. I redrew her eyes from scratch and I also drew in the earrings and used a layer opacity on them. I've also been using the spot healing tool to remove all the scratches and marks. The right side of her face looks like she's smeared with dirt though. I need to clean that up somehow. The shadow just isn't quite right. Comments? Suggestions? Critiques?

Sunday, November 28, 2010

This Year's Christmas Card Completed

The female cardinal took a lot longer than the male one originally did.  I can't tell you how many hours I worked on getting her coloring blended and shaded correctly!  I'm going to VistaPrint and having some cards made with this image so I can send my family and maybe a few friends a copy of this beautiful cardinal pair.